How to Build a Ground Level Deck: A Step-by-Step Guide for DIY Homeowners

Key Takeaways
- Ground level decks are affordable, accessible, and versatile.
- Proper planning and quality materials are essential for success.
- Regular maintenance helps ensure longevity and safety.
Benefits of a Ground Level Deck
Building a ground level deck is a rewarding DIY project that many homeowners are embracing. A ground level deck is a decking structure sitting close to the ground, designed without stairs or elevation, making it highly accessible. Its increasing popularity stems from its affordability, simplicity, and versatile use in various outdoor spaces.
Cost-Effectiveness
Ground level decks are financially appealing. Compared to traditional elevated decks, they require fewer materials and a simpler construction process, which translates to lower costs.
Easy Accessibility and Enhanced Safety
One of the biggest advantages of ground level decks is the easy accessibility they offer. With no stairs, they are ideal for families with children, elderly family members, or anyone with mobility challenges.
Aesthetic Integration with the Landscape
Ground level decks blend beautifully with landscaping, enhancing the natural beauty of your outdoor area.
Versatility for Various Outdoor Uses
A ground level deck can serve multiple purposes, from a seating area for social gatherings to a platform for barbecues, container gardens, or even play spaces for kids.
Planning Your Ground Level Deck
Proper planning is crucial to ensure a successful build. Here’s how to navigate through the planning phase effectively.
Selecting Ground Level Deck Plans
Choosing the right plan tailored to your personal style, yard dimensions, and intended usage will ensure structural integrity and aesthetic appeal.
- Rectangular Decks: Straightforward, easy to construct.
- Square Decks: Great for small spaces.
- Multi-Level Low Decks: Adds dimension and visual interest.
- Decks with Built-in Features: Incorporating benches or planters enhances utility.
Determining the Location and Size
Before construction, assess the space available in your backyard. Here’s what to consider:
- Measure the Area: Keep foot traffic in mind for optimum deck placement. For detailed guidance on measuring, refer to How to Read a Measuring Tape.
- Sunlight and Shade Patterns: Note how these change throughout the day.
- Wind Direction and Privacy: Take these into account for a pleasurable outdoor experience.
- Building Codes and Permits: Always check local regulations to avoid future issues.
Materials Needed for Low Deck Installation
Gathering the right materials is critical to your project’s success. Here’s what you will need:
- Lumber: Use pressure-treated wood rated for ground contact or consider composite decking for longevity and low maintenance. When calculating the amount of lumber needed, refer to How to Calculate Board Feet.
- Hardware Essentials: Stock up on galvanized or stainless steel screws, nails, and metal brackets compatible with treated lumber.
- Tools Needed: Ensure you have a circular saw, drill with screwdriver bits, measuring tape, carpenter’s level, shovel, speed square, safety goggles, and gloves.
- Additional Materials: You might need gravel or sand for building a drainage base, landscape fabric to deter weeds, and concrete pavers or deck blocks for foundation support.
Step-by-Step Guide: How to Build a Ground Level Deck
Now that you have all your plans and materials ready, follow this comprehensive step-by-step guide.
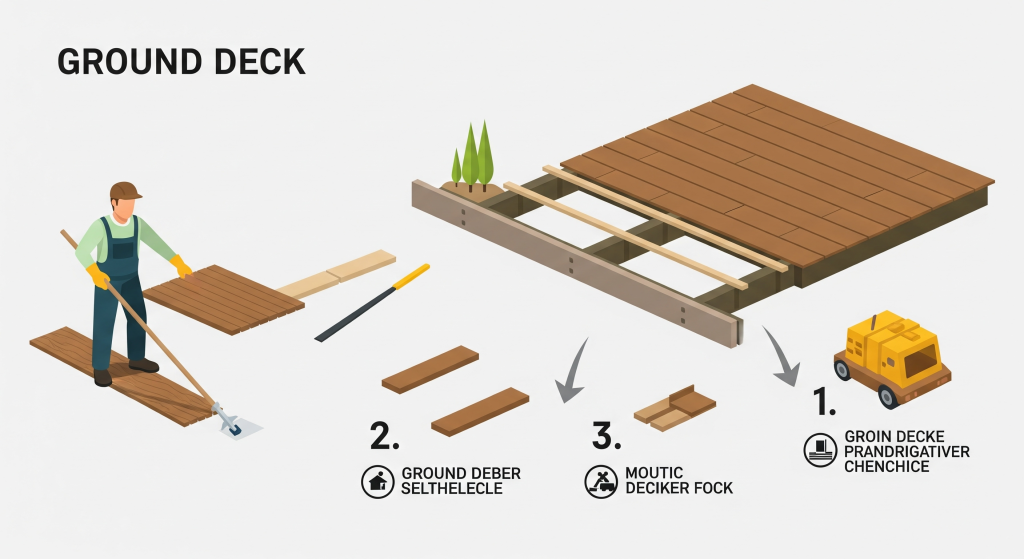
Preparation
- Mark the Deck Perimeter: Use stakes and string to outline where your deck will be located.
- Clear the Site: Remove any vegetation, rocks, and debris. Level the ground by cutting or filling soil as necessary.
Building the Foundation
- Prepare a Drainage Layer: Spread a 3-4 inch layer of gravel or sand for drainage.
- Place Concrete Deck Blocks: Position concrete blocks at the calculated intervals.
- Check Stability: Ensure each footing is level before moving on to the next steps.
Constructing the Frame
- Frame Assembly: Assemble the perimeter frame using pressure-treated lumber.
- Joists Installation: Attach joists perpendicular to the perimeter frame and secure them for added strength.
- Level Checks: Continuously use a carpenter’s level to guarantee the frame remains flat and stable.
Installing the Decking Boards
- Board Layout: Lay decking boards perpendicular to the joists.
- Maintain Gaps: Use spacers to maintain consistent gaps between boards.
- Fastening the Boards: Securely fasten the boards with corrosion-resistant decking screws.
Finishing Touches
- Sanding: Sand all rough edges to ensure safety.
- Applying Sealant: Apply an exterior-grade sealant to enhance protection against weathering.
- Optional Additions: Consider optional installations such as low-profile railings or integrated lighting.
Low Deck Installation Tips
- Proper Drainage: Ensure good drainage under and around the deck.
- Use Quality Materials: Always choose ground-contact-rated pressure-treated lumber.
- Level Regularly: Conduct frequent level checks throughout the assembly process.
- Plan for Electrical Utilities: If you foresee adding lighting, plan during the build.
Common Mistakes to Avoid
- Skipping the Planning Phase: Rushing this stage can lead to structural and usability problems.
- Choosing Poor Materials: Selecting low-quality materials can jeopardize your project’s success.
- Ignoring Local Codes: Failing to follow local building codes risks fines and costly re-doing.
- Neglecting Material Movement: Not considering the wood’s natural expansion and contraction can lead to issues.
Maintenance of Ground Level Decks
- Regular Cleaning: Sweep off leaves, dirt, and debris to reduce moisture buildup.
- Annual Inspections: Look for loose or damaged boards and address issues quickly.
- Reapplication of Sealers: Apply sealants every couple of years to maintain weather protection.
- Quick Repairs: Make minor repairs as soon as possible to prevent costly damages.
Conclusion
In conclusion, building a ground level deck can enhance your outdoor living space significantly. This guide provides the key concepts on how to build a ground level deck, from understanding its benefits to detailed construction techniques. Remember to plan carefully, select quality materials, and follow the steps outlined in this article to ensure a successful project.
Start your DIY journey today, and transform your backyard into a beautiful space for relaxation and entertainment! Check out detailed ground level deck plans for inspiration and continued guidance.
Additional Resources
For further information and ground level deck plans, check out these useful links:
Consider visiting local suppliers or hardware stores for materials. Additionally, find helpful visual guides and video tutorials on platforms like YouTube.
With the right planning and materials, your ground level deck can become a highlight of your home for family and friends to enjoy!


