How to Install a Fence: Your Ultimate DIY Fence Building Guide
Building a fence is one of the best ways to improve your home’s privacy, security, and overall look. How to Install a Fence becomes easier when you follow a clear, step-by-step approach. This ultimate DIY guide will help you choose materials, use the right tools, and complete your project with lasting results.

Planning Your Fence Installation
Before you embark on your fencing journey, it’s vital to assess the purpose of the fence. Understanding why you want a fence will help you choose the right materials and design.
Assessing the Purpose of Your Fence
- Privacy: For intimate spaces, opt for a solid wood fence, which will offer both seclusion and aesthetic appeal.
- Security: A sturdy metal or vinyl fence can provide a deterrent against intruders.
- Aesthetic Enhancement: Consider decorative wood or vinyl options to boost curb appeal while achieving your functional goals.
Measuring Your Property
To ensure a correct fit, accurately measure the area:
- Walk the intended fence line to familiarize yourself with the layout.
- Use a tape measure or measuring wheel to determine the total fence length.
- Remember to plan for typical post spacing, usually between 6 to 8 feet.
Local Zoning Laws and Permits
Before starting your fence installation:
- Research local zoning laws and property boundary rules.
- Confirm if any permits are needed to avoid legal troubles.
- Contact local municipality offices or check online portals for specific regulations.
Materials and Tools Required
Selecting the right materials and tools is essential for a successful fence installation.
Essential Materials
- Fence Posts: Choose based on your fence type (wood, vinyl, or metal).
- Fence Panels or Rails: Decide between pre-fabricated or custom options.
- Concrete Mix: Necessary for securing the posts.
- Gravel: Allows for drainage at the base of post holes.
- Fasteners: Ensure you have appropriate nails, screws, or fasteners based on the material chosen.
Necessary Tools
- Post Hole Digger or Auger: For digging holes for the posts.
- Hammer or Power Drill: Essential for assembling the fence.
- Level: Important to ensure all installations are plumb.
- Saw: Use a hand saw or power saw to make accurate cuts on panels or rails.
- Tape Measure: For accurate measurements.
- Stakes and String or Spray Paint: For marking the fence line.
Understanding the function of each material and tool will help streamline your installation process.
Step-by-Step Fence Installation Guide
Preparing the Site
- Clear the Area: Remove any debris, vegetation, or obstacles along the intended fence line.
- Staking Out the Fence Line: Use wooden stakes and string or spray paint to mark the exact path and post locations, typically spaced 6 to 8 feet apart.
- Calculate the Materials Needed: Use tools like How to Calculate Board Feet to estimate the amount of lumber required based on your measurements.
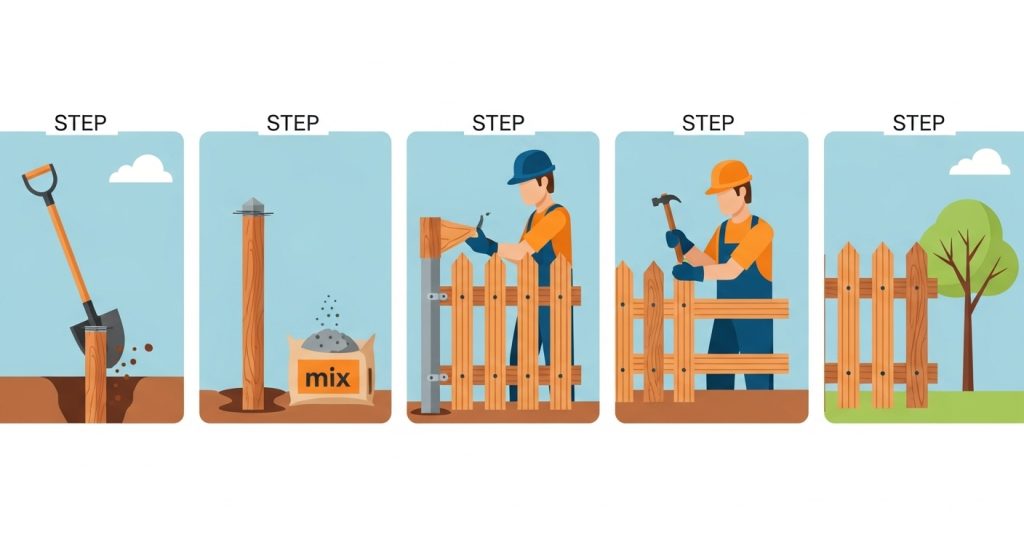
Setting the Fence Posts
- Dig Post Holes: Make sure each post hole is 1/3 to 1/2 the length of the post, reaching below the frost line (usually 2 to 3 feet deep).
- Add Gravel: Pour 4–6 inches of gravel at the bottom for drainage.
- Position the Posts: Insert posts upright, making sure they are level. Use temporary supports to brace them.
- Pour Concrete: Mix and pour concrete around each post. Allow to cure completely for 24 to 48 hours.
Attaching Fence Panels or Rails
- Horizontal Rails: If using rails, attach them between the posts.
- Mounting Panels or Pickets: Use nails or screws to secure them to the posts, maintaining level alignment. Use spacers for uniform gaps.
- Cutting for Fit: If sections need adjusting, cut panels or rails accordingly.
Finishing Touches
- Install Gates: Ensure they swing correctly and are aligned properly with sturdy hinges.
- Protect against Weathering: Apply sealants, stains, or paint to wood fences after installation.
DIY Fence Building Tips
- Double-Check Measurements: Always ensure accuracy before cutting or drilling.
- Use a Level Consistently: This is vital for maintaining structure and aesthetics.
- Break Project into Phases: Manage your time by completing tasks in smaller segments.
- Quality Materials: Invest in pressure-treated lumber or durable materials, and consider buying in bulk for cost efficiency.
Common Challenges and Solutions
- Uneven Terrain: To manage this, use stepping techniques or adjust post heights.
- Post Rot: Ensure proper drainage by using gravel at the bottom of post holes and tamping concrete firmly.
- Stability Issues: Support posts during the curing process and consider additional bracing in high winds.
Maintenance Tips for Your Fence
- Regular Inspections: Check your fence at least once a year for damages or loose fittings.
- Seasonal Cleaning: Gently wash panels with soap and water to remove debris.
- Refinishing: Wood fences should be refinished every few years to maintain their aesthetics.
Conclusion
Now you are equipped with the knowledge of how to install a fence effectively. Recapping the key steps highlighted, from planning through ongoing maintenance, puts you in control of your fence building project.
Embrace the challenge of DIY fence building; enjoy the savings, the personalization involved, and the rewarding experience of completing your home improvement project.
Feel free to explore additional blog posts or resources for advanced fencing techniques!
Key Takeaways
Following the step-by-step installation guide can simplify your project.
Understanding the purpose of your fence is key to selecting materials and designs.
Measuring your property accurately ensures a correct fit.
Research local zoning laws to avoid legal issues.


