How to Install a Ceiling Fan by Yourself: A Complete DIY Wiring and Mounting Guide
Installing a ceiling fan is one of those household projects that looks intimidating on the surface—exposed wires, heavy motors, blades spinning inches from your head—but is, in practice, one of the most manageable electrical DIY jobs a homeowner can tackle. Having walked through dozens of home improvement projects over the years and advised fellow enthusiasts on smart, budget-first approaches, I can tell you that the hardest part isn’t the wiring or the mounting—it’s convincing yourself to turn off the breaker and get started. If you follow this step-by-step guide on how to install a ceiling fan, you’ll finish the job in roughly 60 to 90 minutes with basic tools and zero professional help.
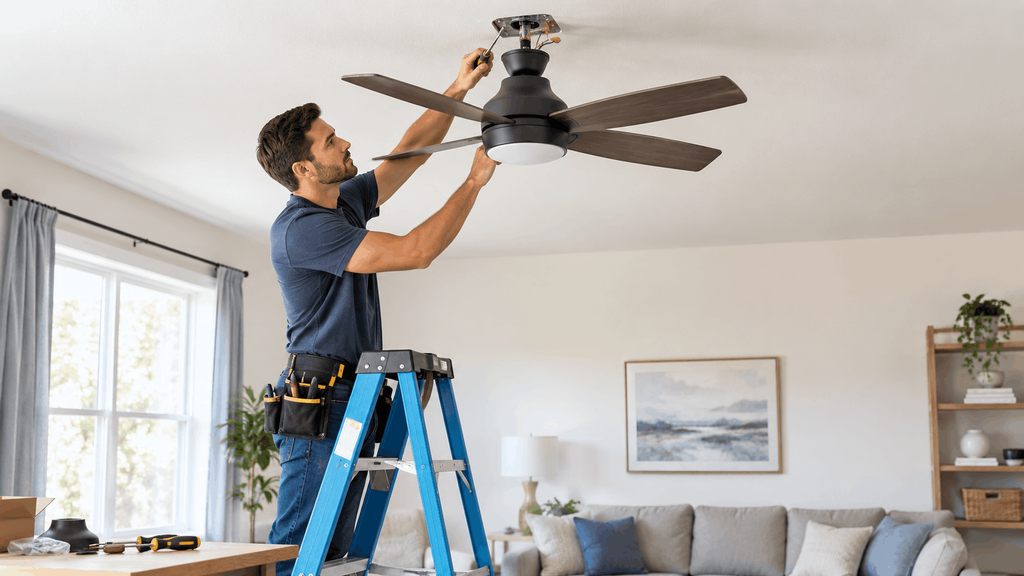
Before You Start: Safety and Planning
Before you even open the box, there are a few critical decisions and safety measures you absolutely must address.
Electrical Safety First
This is non-negotiable: Go to your home’s electrical panel and flip off the breaker controlling the circuit for the room where you’re installing the fan. Do not simply flip the wall switch to “off”—someone could accidentally turn it back on while you’re holding live wires above your head. After killing the breaker, use a non-contact voltage tester (available at any hardware store for around $15) to confirm there is absolutely zero current flowing to the ceiling box.
Check Your Ceiling Box Rating
Standard lightweight fixture boxes (rated for under 35 lbs) cannot safely support a ceiling fan. Ceiling fans vibrate constantly, and an under-rated box will eventually work itself loose, potentially sending a 30-pound motor crashing to the floor. You need a box specifically rated for ceiling fan use—typically labeled “fan-rated” and supporting at least 50 lbs. If your existing box isn’t fan-rated, you’ll need to swap it out before proceeding. This is a $10 part and about 15 extra minutes of work.
Experience-Based Insight: In older homes built before the 1980s, it’s extremely common to find lightweight “pancake” boxes nailed to drywall with zero structural bracing behind them. If you live in an older home, assume you’ll need a new fan-rated bracing kit that clamps between joists through the existing hole—no attic access required.
Tools and Materials You’ll Need
- Ceiling fan kit (fan, blades, mounting bracket, hardware, light kit if applicable)
- Screwdriver (Phillips and flathead)
- Wire strippers
- Wire nuts (usually included with the fan)
- Non-contact voltage tester
- Adjustable wrench or pliers
- Step ladder or scaffolding
- Electrical tape
If you’re comfortable with basic tool use—like what’s required for projects such as installing a fence—you already have everything you need in your toolbox.
Step-by-Step: How to Install a Ceiling Fan
Step 1: Remove the Existing Fixture
With the breaker confirmed off, remove the existing light fixture or old fan from the ceiling. Unscrew the mounting screws, carefully lower the fixture, and disconnect the wires by unscrewing the wire nuts. You’ll typically see three wires: black (hot), white (neutral), and green or bare copper (ground). Let them hang freely from the box.
Step 2: Install the Mounting Bracket
Every ceiling fan includes a mounting bracket that screws directly into the fan-rated ceiling box. Thread the house wires through the center of the bracket, then secure the bracket to the box using the provided screws. Tighten them firmly—this bracket bears the entire weight and vibration of the fan motor.
Step 3: Assemble the Fan Motor and Downrod
Most fans require you to attach the downrod to the motor housing before lifting it to the ceiling. Thread the fan’s internal wires through the downrod, slide the downrod into the motor housing, and secure it with the hitch pin or set screw. The canopy (the decorative dome that covers the ceiling box) should be placed over the downrod at this point as well.
Real-World Tip: For rooms with standard 8-foot ceilings, use the shortest downrod available (usually 3-4 inches) or opt for a flush-mount/hugger fan to maintain adequate headroom. For vaulted ceilings, longer downrods (12-36 inches) are available to bring the blades down to an effective air-circulation height.
Step 4: Hang the Motor and Wire the Connections
Lift the motor assembly up and hook or seat the downrod ball into the mounting bracket’s slot. Most fan brackets have a built-in hook or cradle that holds the motor in place while you connect the wires—this keeps both hands free for wiring.
Connect the wires using wire nuts:
- Black to Black — House hot wire to fan hot wire (powers the motor)
- White to White — House neutral to fan neutral
- Green/Bare to Green/Bare — Ground to ground
- Blue to Black (if applicable) — If your fan has a separate light kit, the blue wire from the fan connects to the house black wire alongside the fan’s black wire. This allows a single wall switch to control both the fan and the light.
Wrap each completed wire nut junction with a layer of electrical tape for extra security, then carefully tuck the wires up into the ceiling box. Slide the canopy up and tighten it against the ceiling to conceal the box.
Step 5: Attach the Fan Blades
Screw each blade bracket to the motor housing, then attach the blades to the brackets. Most fans have 4 or 5 blades with pre-drilled holes. Ensure each screw is snug—loose blade screws are the number one cause of wobbling and annoying clicking noises.
Step 6: Install the Light Kit (If Applicable)
If your fan includes a light kit, snap or screw it into the base of the motor housing. Connect the light kit’s wires (typically pre-connected with a plug) to the corresponding socket on the fan motor, install your bulbs, and attach the globe or cover. This is one of the simplest home improvement additions—far easier than larger structural projects such as building a ground level deck, yet equally satisfying when finished.
Step 7: Restore Power and Test
Return to your breaker panel and flip the circuit breaker back on. Turn the wall switch on. The fan should start spinning and the light (if installed) should illuminate. If nothing happens, kill the breaker again and double-check every wire nut connection.
Use-Case Scenario: If the fan runs but wobbles excessively, use a fan balancing kit (a small clip-on weight that comes with most fans) to correct it. Slide the clip onto different blades one at a time, running the fan after each move, until the wobble disappears. Then permanently attach the adhesive weight to that blade.
Frequently Asked Questions (FAQs)
1. Can I install a ceiling fan where a light fixture was?
Yes, as long as the ceiling electrical box is rated for fan use (at least 50 lbs). If the existing box is a standard lightweight fixture box, you must replace it with a fan-rated box or a bracing kit before proceeding.
2. Do I need an electrician to install a ceiling fan?
Not in most cases. If there is already an existing ceiling box with wiring in place, a ceiling fan is a straightforward DIY project. However, if you need to run entirely new wiring from scratch, consulting a licensed electrician is strongly recommended.
3. What size ceiling fan do I need for my room?
For rooms up to 75 sq ft, use a 29-36 inch fan. For rooms from 76 to 144 sq ft, use a 36-42 inch fan. For rooms from 144 to 225 sq ft, use a 44-50 inch fan. For rooms over 225 sq ft, a 52-inch fan or larger is recommended.
4. Why does my new ceiling fan wobble?
Wobbling is almost always caused by unbalanced blades, loose blade screws, or an improperly secured mounting bracket. First, tighten all blade screws. If wobbling persists, use the balancing kit included with most fans to add a small weight to the offending blade.
5. Can I install a ceiling fan on a sloped or vaulted ceiling?
Yes. Most modern ceiling fans include an angled mounting adapter or a ball-and-socket mount that allows the downrod to hang vertically even when the ceiling slopes. You may need a longer downrod to ensure adequate blade clearance from the angled surface.
6. What is the ideal height for a ceiling fan?
The bottom of the fan blades should hang at least 7 feet above the floor for safety and optimal air circulation. In rooms with 8-foot ceilings, this typically means using a flush-mount or hugger-style fan rather than a downrod model.
7. How much does it cost to install a ceiling fan?
If you DIY, the only cost is the fan itself, which ranges from $50 to $300+ depending on brand and features. Professional electrician installation typically costs an additional $100 to $250 per fan, on top of the fan price.
8. Should a ceiling fan spin clockwise or counterclockwise?
In summer, set the fan to spin counterclockwise (looking up at it) to push air directly downward, creating a wind-chill effect. In winter, reverse it to clockwise on a low speed to gently circulate warm air that has risen to the ceiling back down into the room.